

Quickstart
This guide takes you from an empty AWS account to a working branch database: one npx @10play/tendb init, one tendb up, one tendb branches create. The engine is a single EC2 host running DBLab Engine (Database Lab Engine, by Postgres.ai) on ZFS — it dumps your source database on a schedule and serves copy-on-write clones in seconds.
Prerequisites
Section titled “Prerequisites”You need:
-
An AWS account with credentials configured locally (
aws configure, SSO, or environment variables). Applying the Terraform stack requires broad permissions (EC2, VPC, IAM, SSM, KMS); day-to-day CLI use needs only the narrow policy the module outputs — you’ll attach that in step 4. -
Terraform >= 1.11 and AWS provider
~> 6.0. The 1.11 floor is real: the module uses write-only (value_wo) arguments so the API token never enters Terraform state. -
Node.js >= 20 for the CLI. Install it globally (
npm install -g @10play/tendb) so the baretendbcommands below work — or prefix every command withnpx @10play/tendbinstead. -
The AWS Session Manager plugin — the CLI reaches the engine exclusively through SSM port-forwards, no SSH, no open database ports:
Terminal window brew install --cask session-manager-pluginTerminal window curl -fsSL https://s3.amazonaws.com/session-manager-downloads/plugin/latest/ubuntu_64bit/session-manager-plugin.deb -o /tmp/smp.debsudo dpkg -i /tmp/smp.debFollow the AWS Session Manager plugin install guide for Windows and other Linux distributions.
-
psql— used in step 1 to check your source’s major version, and bytendb psql:brew install libpqon macOS, or your distro’spostgresql-clientpackage.
Zero to first branch
Section titled “Zero to first branch”-
Put your source database URL in Secrets Manager.
The engine host pulls the source URL at boot through its instance profile — it never transits Terraform state, user data, or CI. Create the secret out of band:
Terminal window export SOURCE_URL='postgres://user:pass@host:5432/dbname'aws secretsmanager create-secret \--name tendb/source-url \--secret-string "$SOURCE_URL"psql "$SOURCE_URL" -c 'show server_version'Note two things from the output: the secret ARN, and your source’s Postgres major version — the scaffolder asks for both in the next step. Any Postgres URL works: Neon, Aurora, RDS, self-hosted.
-
Scaffold the deployment.
From your project root:
Terminal window npx @10play/tendb initIt asks for the platform (
aws), region, size, the Postgres major version, and the secret ARN from step 1, then writes atendb/directory (real Terraform you own and can edit — a minimal VPC plus the engine, with module sources pinned to a tendb release) and atendb.jsonat your project root. Every prompt has a flag twin for CI:npx @10play/tendb init --platform aws --yes --region us-east-1 --pg-version 16 --source-secret-arn arn:....The Postgres major version is asked without a default on purpose: it selects the clone Postgres image, and the clone image’s major version must match the source or the restore fails — that’s what the
show server_versionin step 1 was for.Two edits worth making in
tendb/terraform.tfvarsbefore bringing it up: if the secret is a JSON object rather than a bare URL (say{"NEON_DATABASE_URL": "postgres://..."}), setsource_secret_json_keyto the key name; Neon sources also wantdump_exclude_extensions = ["pg_session_jwt"].tendb.jsonis a plain committed config file — the CLI walks upward from the current directory until it finds one, so the repo root covers every subdirectory. Add"profile": "your-aws-profile"if you use named profiles; see Configuration for every field. -
Bring it up.
Terminal window tendb upupverifies the source secret exists, then runsterraform init+terraform applyintendb/(a few minutes) and folds the stack’s discovery outputs back intotendb.json— no hand-written config. Plainterraform applyin the directory works too;tendb downdestroys the stack. The host has zero ingress by default — no SSH, no key pair, IMDSv2 only; all admin and client access rides SSM Session Manager.Under the hood / doing it by hand
The scaffold is a thin root module over
terraform/modules/aws/{network,engine}from the tendb repo. Prefer full control? Clone the repo and start frompackages/tendb/terraform/examples/standalone— that’s the maintainers’ own deployment wiring (its committedterraform.tfvarspins their live stack; replace it entirely). -
Grant your users the client IAM policy.
The engine module renders a least-privilege policy for CLI users and CI: SSM session access scoped to the engine host by tag, plus read access to the discovery parameters (including the API token — the CLI derives clone passwords from it locally). The scaffold sets
create_client_iam_policy = true, so the policy already exists as a managed policy — attach its ARN to your user, group, or CI role:Terminal window aws iam attach-user-policy \--user-name you \--policy-arn "$(terraform -chdir=tendb output -raw client_iam_policy_arn)"If you’d rather embed the JSON in your own IAM setup, the raw document is the module’s
client_iam_policy_jsonoutput. If your local credentials are already admin, you can skip this step for yourself — but CI will need it. -
Wait for the first sync.
At boot the engine dumps your source database and restores it into the ZFS pool — minutes for small databases, hours for large ones. Watch it with
tendb status:health sync mode sync status last refresh next refresh data state at disk clonesOK logical finished - in 15h 20260818123448 0% of 19GB 0 / 10Once
data state atshows a timestamp, the first snapshot exists and branches will provision. (You don’t have to poll:branches createwaits up to 15 minutes for the first snapshot on its own.) If the first sync fails: the boot log on the host is/var/log/dblab-init.log, engine logs aredocker logs dblab_server, andaws ssm start-session --target <instance_id>reaches the host — there is no SSH. -
Create your first branch.
Terminal window tendb branches create my-featureIn a few seconds you get a full copy-on-write database. Progress goes to stderr; the only thing on stdout is the connection URI:
postgres://my_feature:1a2b3c…@10.60.100.12:6000/mydbThe command is idempotent — running it again returns the same branch. A bare number is PR shorthand:
tendb branches create 42createspr-42. -
Connect.
The quickest look around — auto-tunnel plus interactive psql:
Terminal window tendb psql my-featurePass psql arguments after
--:Terminal window tendb psql my-feature -- -c 'select count(*) from users'For an application, print the URI with
tendb connection-string:Terminal window tendb connection-string my-featureThat URI uses the host’s in-VPC address, so from your laptop open a tunnel first and use the localhost form:
Terminal window tendb tunnel my-feature # keeps running; ctrl-c to stop# in another shell:tendb connection-string my-feature --localOr do both in one shot — run any command with
DATABASE_URLalready set:Terminal window tendb tunnel my-feature -- npm testDone experimenting? Branches are disposable:
Terminal window tendb branches delete my-feature -
Open the console.
Terminal window tendb consoleA Neon-style dashboard on
http://localhost:4400, over the same SSM session — branches, a SQL editor, snapshots, and alerts, with nothing sensitive ever reaching the browser. See the web console for every screen.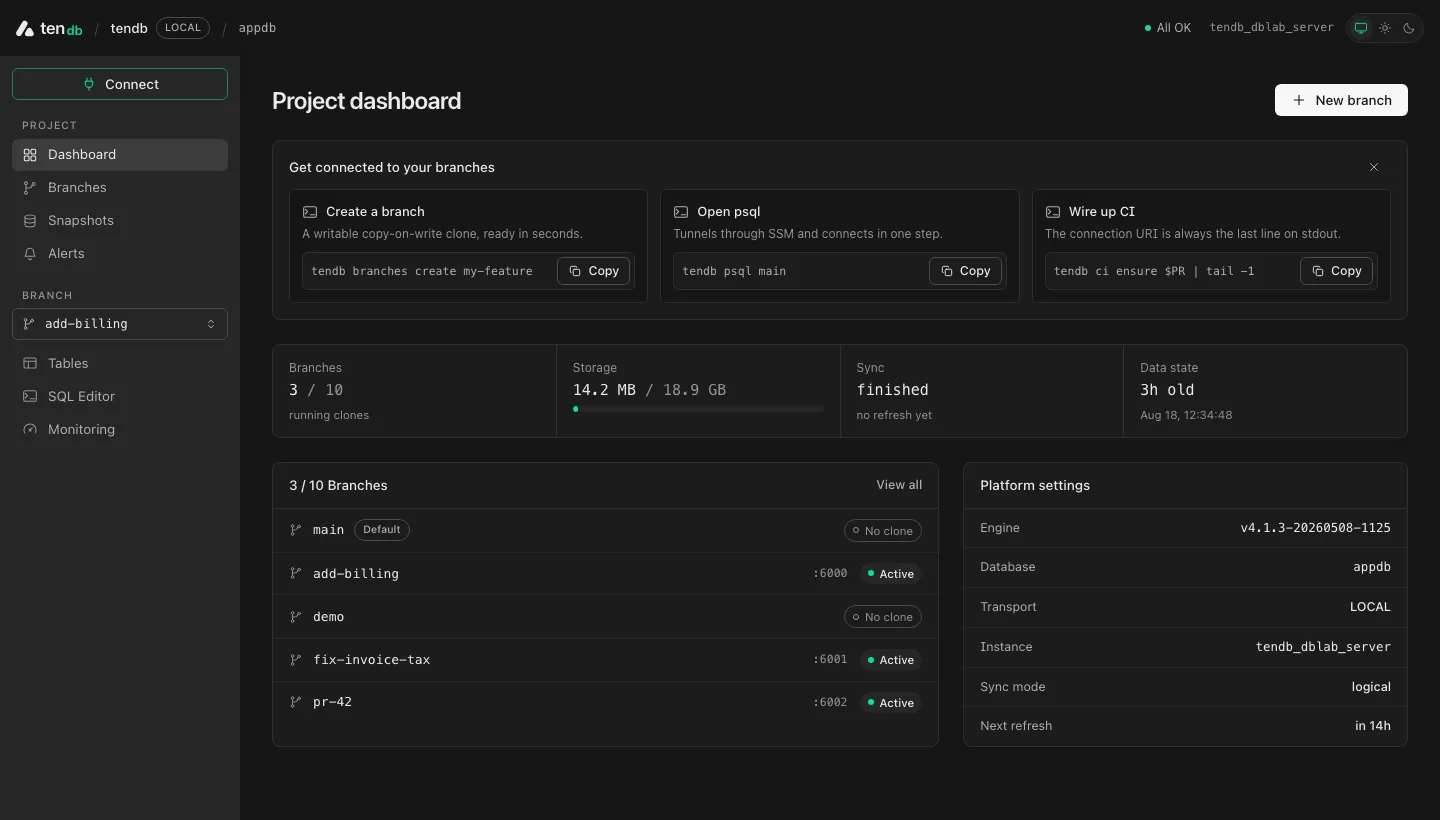
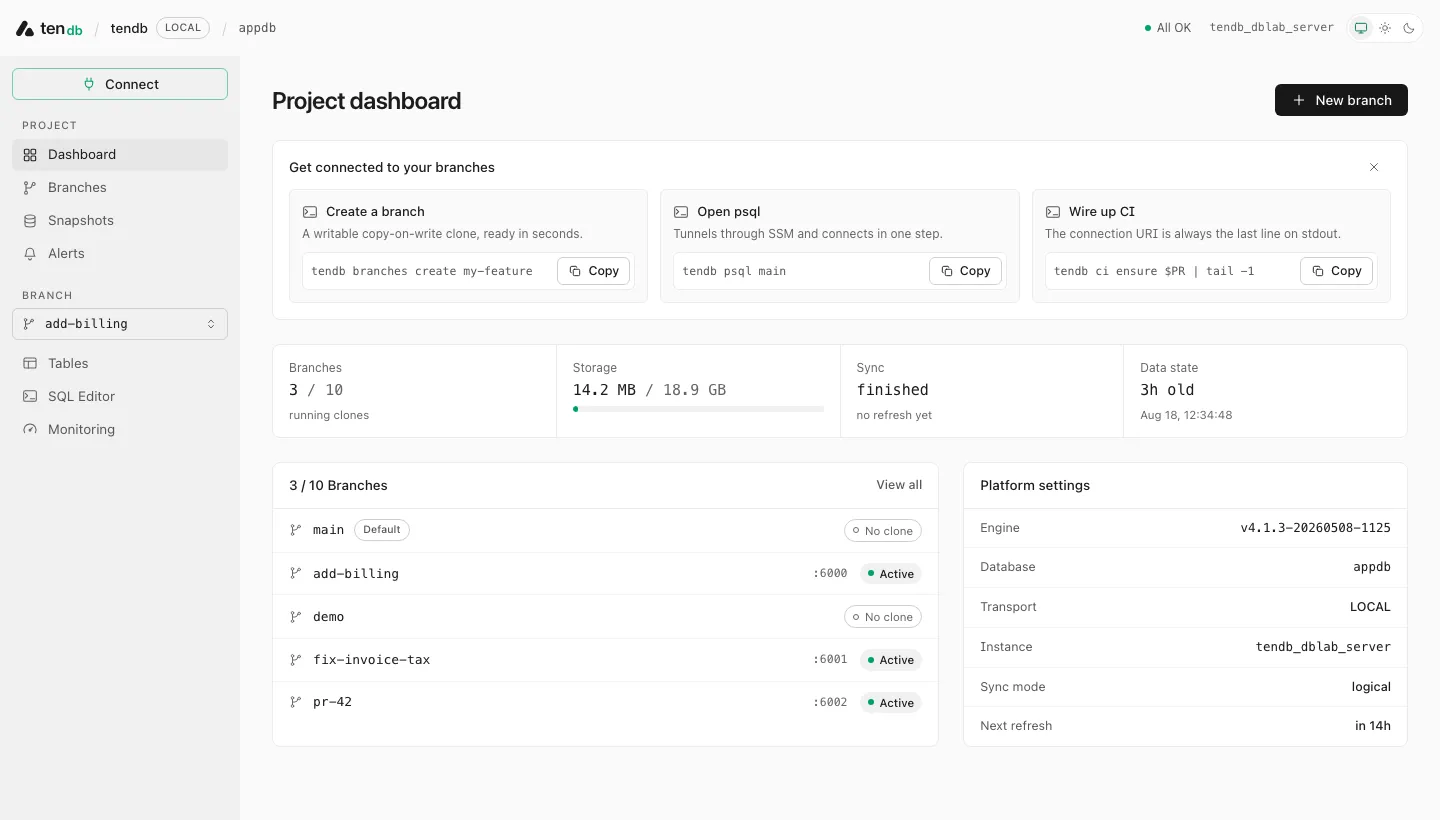
tendb console — branches, storage, sync state, and platform settings (shown here on a local-platform deployment; yours will read SSM).